
Flash Crystal Bugger by Jason Akl
article copyright
The Wooly Bugger fly pattern has to be one of the most productive streamer patterns to ever be created. Over the last few decades the wooly bugger style of flies have without a doubt accounted for more and larger fish being duped than with any other freshwater fly. The main reason for the wooly bugger’s great success is its ability to be adapted to catch virtually any fresh water fish that exists and to be used in all the different water conditions that may occur. From trout to bass, rivers to spring fed lakes the wooly bugger can just about do it all. The Crystal Bugger fly pattern is a relatively new addition to the wooly bugger family. Simple enough the crystal bugger boasts a flashy estaz body instead of the traditional chenille to spice things up a bit. This added flash coupled with the undulating action produced by the marabou tail in the water makes this fly a definite steelhead spring time favorite. Another of the key features of this fly is the Spirit River metallic bead head. This bead head provides the fly with the necessary weight to get it down on the bottom of those big deep pools where the big steelies like to hang out.
Fishing the bead head crystal bugger is relatively simple. If you are going to be fishing very cold weather cast this pattern to your target and let it dead drift drag-free down the river. Fish that are in these very cold temperatures become very lackadaisical and will not aggressively search out and chase down prey. Providing a slow subtle presentation with the crystal bugger will help keep your fly in the fish’s strike zone for longer providing you with a better chance of hooking into quality fish. In summer these same lazy fish will now be ready for a more active and rapid approach. Continuously stripping in the wooly pattern will have the head-heavy fly dancing up and down in the water column driving the fish wild.
Materials used in the Crystal Bugger
Hook: Daaichi Streamer Size 4
Thread: Uni-thread 8/0 black
Body: Crystal Chenille
Tail: Marabou
Hackle: Black Soft Hackle
Head: Bead
Tying Steps
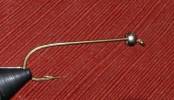 1. Start this fly by sliding the bead on the hook shank small hole first and pushing it up to the hook eye. Place your hook into your vice and secure it into place tightly. Attach the tying thread onto the hook and advance it to the ½ mark on the hook shank.
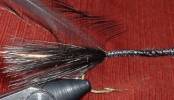 2. Select a single black marabou plume, and align the tips of the feather with a few strokes of your fingers. Strip away any of the small base herls that are not the same length as the other fibers from the feather. With a few wraps of thread tie down the marabou plume to the top side of the hook shank. Adjust the length of the tail section by pulling the tail fibers until they are approximately the same length as the hook shank. Once you find the right length for the tail wrap the thread down the hook shank until you reach the point above the barb and then wrap back up the shank binding down all the marabou fibers.
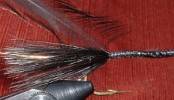 3. Clip a small piece of copper wire and wrap it down onto the bottom side of the hook shank. Along with this copper wire tie in one of the black bugger hackles tip first and then proceed to wrap the thread once again to the point above the barb (an alternative method to tying this type of fly would be to omit tying in the hackle at this stage, and tying it in after the body has been created. In this fly we will be wrapping the hackle forward and in the later you would be wrapping the hackle down the hook shank and tying it off with the copper wire).
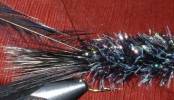 4. Cut a small piece of the opal black estaz and strip off the last ¼ inch or so of the fibers so that just the core string is left. Tie this string core down to the hook shank and wrap it down until you get to the point above the barb. Wrap the estaz forward up the hook shank but be careful that you do not wrap down any of the fibers from the previous wraps. Stop the body shortly before reaching the back of the hook eye and tie off the estaz.
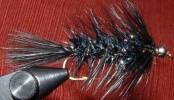 5. Palmer the black forward creating a nice even body hackle and create a small bushy hackle collar for the back of the bead head. Tie the hackles off with your thread and now counter wrap the copper wire forward binding down the hackle. Again be careful not to wrap down any of the hackle fibers that were laid in place in the previous steps. Tie off the copper wire and clip the tag end.
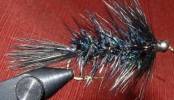 6. With the thread wrap back onto the hackle a tiny bit to create swept look to the fly and then whip and cement the thread.
author website: visit | author bio
![]()

