EC Cutter Caddis by Jason Akl
article copyright
Since its original publishing in the year of 1981 many fishermen the world around have tried to improve and change the Ralph Cutter Caddis pattern, only to come back to the original style. The E/C Cutter caddis is a fantastic fly pattern that imitates an adult caddis that is emerging or has become trapped in their pupal shuck, giving way to the name E/C, emergent/ cripple caddis.
From an underwater vantage point Ralph Cutter studied caddis’ to realize that traditional hackles on his pattern did not actually simulate what a live hatching caddis fly looked like while drifting down stream. Ralph changed the hackle on his fly to a parachute wrap around the base of the wing to better produce the impression of a crippled caddis. Cutter also used life-like materials like Antron or Zelon on this pattern and it does a great job in imitating the trailing shuck seen with the real critters. In addition to this Cutter used contrasting colors for the body of the fly (green thorax, brown abdomen) to help better simulate the look of a fly emerging from its pupal shuck.
To fish the E/C Cutter Caddis, no special conditions or tackle are required. Simply douse the fly’s wings, hackle, and thorax with gel floatant or dry fly spray, but be careful not to touch or spray the abdomen of the fly as you want it to sink beneath the film. If you are going to be fishing this pattern as a searching pattern, then a good idea is to use a long leader so that you do not spook any potential fish. If you are going to be fishing a caddis hatch, simply match the fly you are using as best you can to the hatching insects and hang on because it will not take long before the fish take notice and start biting.
Materials Used in the E/C Cutter Caddis:
Hook: Daiichi Dry Fly Size 12
Thread: Tan Uni-Thread 8/0
Tail: Tan Antron
Body: Hares Ear Dubbing/ Green Rabbit Dubbing
Wing: Natural Deer Hair
Hackle: Grizzly Dry Fly Hackle

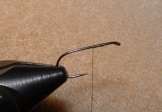
1. Start this fly by placing your hook into the vice and securing it down tightly. Attach your thread behind the hook eye and clip the tag end.

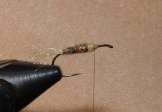
2. Select a small portion of ginger antron or zelon and wrap it down to the hook shank with the tying thread extending off the back of the hook. Clip the tail approximately the same length as the width of the hook gape. With the tail finished pinch dub the thread with the hares ear dubbing. Build a small tapered body and stop at about the ½ mark on the hook shank. Pinch dub the thread with the green rabbit dubbing and continue building the tapered body until you reach the ¼ mark on the hook shank.

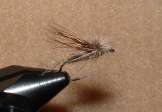
3. Tie in a grizzly hackle by the stem in-front of the tapered body you just built. Select a small patch of deer hair, stack the tips even and tie it on top of the hook shank securely. As you apply pressure to the deer hair, be careful not to spin the hair around the hook shank. At this point you can choose to cut the butt sections to the hair short or leave them long to make handling them easier.

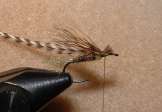
4. Finishing dubbing the body with the green rabbit dubbing and advance the thread to the back of the hook eye. Wind the hackle around the deer hair wing and base several times and tie it off behind the hook eye neatly. Whip finish the thread and cement the head thoroughly.
author website: visit | author bio
![]()

