
This is a project that was created out of necessity years ago when times were financially lean and prices for manufactured portable icefishing shelters were out of the question. With these same financial times affecting a large majority of our outdoor enthusiasts, I thought it would be a great time to revise an old article with some in-depth steps for building your own portable icefishing shelter. This project can be finished for under $50 using 1/2″ plywood and a 10′ x 16′ blue utility tarp. This price estimate includes the need to buy hinges and 2×2’s. The project would acquire more cost with the optional paint and addition of a Plexiglas window. All in all the building process of this portable shelter can really make for a fun project for the kids to also get involved. And, although you can easily build this yourself, and extra set of hands, albeit small, really come in handy when taking final measurements for the support extensions.
Keep in mind that even though this shelter was created with the icefisherman in mind, with two small alterations, substituting the blue tarp for camo netting and the obvious need for a window, you can turn this shelter into a portable hunting blind. I should also note that the portable shelter we made used all of the options. We chose a black tarp and black paint for the walls to soak up as much sun as possible. Attached to one end of our shelter were a pair of old skis that allowed us to tow the shelter easily across the ice and snow while allowing for space to bungee strap our gear onto during the travel. We also included the optional Plexiglas window and, I must confess, this worked great. On our first fishing trip onto the ice we had several visitors stop by and ask for instructions to build their own. No instructions were really needed. You could take one look at the shelter we built and go home and make one from memory. It’s really that simple. It wasn’t long afterwards we began seeing similar shelters all over the ice.
First of all here’s a quick visual reference for the final project. Think in terms of a covered wagon. The cover for the wagon would be your tarp and the openings on each end would be your basic shape for your plywood walls.
 Items Required To Build A Portable Ice Shelter
Raw Materials:
2 – 4′ x 8′ sheets of 1/2″ plywood
2 – 2″ x 2″ x 8′ boards. You can rip a 2 x 4 in half for this if desired.
1 – Utility tarp preferably 10′ x 16′ in size
2 – Hinges
1 – Door handle
screws
staples
Tools:
Jig saw
Tape measure
Staple gun
Drill for optional ventilation holes
Other Options:
Paint to help protect the surface of plywood
Plexiglas to create windows
Skis to allow for easier transport
This project should take about 2 hours for the basic model with no additions.We rated the skill level as 3 stars simply because power tools are involved. If you were to include the optional doorway window and skis we would suggest adding another hour to the project. If you plan to paint your shelter also add another hour or more depending on drying time in between coats of paint.
 Let’s Get Started!
Lay your first sheet of plywood across two sawhorses. We figured on a 6 foot tall center for our shelter so I will also use those measurements in this article.
The easiest way to make a nice arch for the top of the shelter is through the simple act of using a pencil on a string. Confused? No problem. First find the center of your plywood from the 4 foot end. Make a mark at two feet. Now move 6 feet higher on the sheet of plywood and make that same 2 foot center mark. This will be the very top of your arch measurement. Now, grab a pencil and tie a length of string to one end. The length of the string will determine the curve to your arch. A shorter string will create more of a curve and a longer string a less curve. This is your choice of preference but we recommend making the travel of the arch pronounced enough that snow will not be able to collect on the roof.
Hold the end of your string on center, your 2 foot mark on the plywood, and bring your pencil to the top of your arch measurement at the 6 foot level. Start here and work your pencil to the left and right of the plywood while holding the other end of the string firm. Optionally you can use a small screw to secure your string rather than holding it or, this is a great moment to get your kids involved and give them this little, but most important, job.
Now that you have the arch template shape marked it’s time to break out the jig saw and get cutting. Once you have the first wall cut out there’s no need to go through the same measurement process again. Simply lay the wall template you just cut onto the second sheet of plywood and trace your shape for cutting the second wall. See, I told you this was easy and that was actually the hard part.
Take notice as this is the optimal moment to paint your shelter if desired. Most people skipped this step as they would rather continue with the build, and I don’t blame them for that. I felt the same way. However, I got my daughter involved at this step and we painted both sides of the plywood a jet black at this time. She enjoyed the involvement in the project and the shelter itself lasted through 4 seasons of rough use while those that were unpainted lasted 2 seasons at best. Pay particular attention to painting the edges that will contact the ice as this is where the wood will begin to deteriorate first.
 If you’re skipping the paint then onward we go!
Now you get to customize a little and make your own personal statement with the doors and windows. Again, if you’re going to pass on the window option take into consideration whether you will be using tipups set outside the shelter somewhere and also the fact of whether you will need a device for added light in the later evening hours when the walleyes begin to feed. A couple small Plexiglas windows solve both of these problems with very little work.
You’re going to need a door and this is another simple step but pay attention to the added notes.
We created a door that was 2 feet wide and 4 feet high. It’s a small door but it helps hold the structure’s integrity together. You start making the doorway by measuring to the center of your plywood once again to find the two foot mark. Take note to leave about 4 inches of space from the bottom of the sheet of plywood to the bottom of your door. This will also help preserve the structure through the rigorous usage of fishing and traveling. Measure your doorway of 2 feet wide by four feet high and cut out with the jig saw. If you plan to have one of those windows in the doorway now is the time to cut that while you have your door on the saw horses or bench. We made 1 foot square windows in our door and on the opposite wall. Also add some ventilation holes near the top of the shelter if you plan to use portable propane heaters. A basic 1 inch auger bit or hole saw will make short work of some quick ventilation near the top of the shelter.
Your hardware comes next. Mount your hinges to the door and also your door handle. Your door handle doesn’t need to be anything fancy and really only needs the handle on the outside as the door will push open from the inside quite easily. With your hinges and door handle secured, now you can mount the door back on the wall and secure the hinges. Things are really take shape at this point!
 The extension brackets are actually going to be the supports for your 2×2’s which will extend the walls of your shelter and stretch the tarp once it’s complete. We made ours from some leftover 2×2 lumber and they worked quite well. They can also be made from leftover plywood but pay particular attention to making them thick enough so your 2×2’s won’t keep falling out of the brackets. This is in part why we chose to use the 2 x 2 scraps for the brackets. In time your tarp will stretch, especially when the sun is hitting it even though it’s sub-zero outside. Also wind is quite predominant out on a large body of frozen water. With these being your only facet keeping the walls together, and standing, you want to make sure they are reliable.
The basic shape noted in the graphic to the right is a “U” shape. The space inside this “U” shape needs to be adequate for the 2 x 2. We chose this simple shape because it was easy and it proved very reliable as we fished in the windiest of whether where we thought the entire shelter might fly away like a tent at any moment but never once did we lose a support. Or the shelter for that matter.
You should situate these support brackets near the bottom of your arch for optimal placement. I decided a second set of brackets would further enhance the structure if placed near the floor. This required a second set of 2 x 2’s. In hindsight, this did accomplish the intention but added two extra elements to handle and, most shelters I saw that were built afterward only used on set of supports and faired just as well. Hey, it’s a personal choice and you build it the way you want. That’s part of the fun.
A quick note to the fishermen reading this. The 2 x 2 that lays across the extension brackets makes a great place to hang gloves, a radio, or gaff hook. A couple simple eye hooks provide plenty of ideas and options.
 For those who haven’t purchased a tarp yet the measurement process of how big of a tarp you will need is quite easy. A seamstress or cloth tape will work just fine. For those who have neither, a long piece of string that you can measure afterwards will work.
Run your string or cloth tape measure along the edges of your walls from a bottom corner along the perimeter back down to the opposite bottom corner. Now, with that measurement in hand, add 2 feet to the total length. Why add two feet? This will leave extra tarp that will lay on the ice which can then be banked up with snow or slush to keep the wind from traveling underneath the tarp. Don’t skimp in this area or you might find your fishing holes constantly freezing over.
Attaching your tarp to the walls is nothing more than finding the center of your tarp and holding it to the center of your arch at the top. Allow about 4 inches of tarp to overlap the wall. Begin stapling from the top down following the travel of the wall template as you go. Repeat the process for both walls and you now should have the basic structure complete. For those who aren’t in a hurry and like the extras, you might consider a length of garden hose, split in half, stapled along the edges of your plywood walls before stapling your tarp down. This will keep the tarp from rubbing against the rough edges of the plywood and consequently last much longer. For future reference, in the event of needed tarp repairs, you can buy tarp repair tape that will create an instant fix for small problems like tearing or fraying.
Now that you have everything in place it’s time to set this shelter up and have a look at your work.
The easiest method is to stand the entire project on end with the door facing you. Grab a 2 x 2 and enter the shelter using the 2 x 2 the push against the opposite wall. Once the shelter has reached the limit of the tarp you can get a measurement for the length you will need to cut your 2 x 2. I don’t recommend cutting the 2 x 2 ahead of this stage as the tarp is not going to be a perfect fit on both sides so a custom measurement will be required. Good time to get the kids involved again! Measure the distance between the walls for both sides of the shelter and cut your 2 x 2’s accordingly. Simply set them inside the brackets you made and you’re golden. The shelter will stand on it’s own and is ready for the ice. Congrats!
Keep in mind this project probably seems very complicated in writing but you’ll quickly see how easily this shelter moves along. In fact, in the time it took to write this article and create the graphics, I could have easily built two of these shelters. And again, it’s a great project for those days when you’re stuck at home and I guarantee the kids will enjoy lending a hand. In fact my daughter and I built a second smaller portable shelter just for her to mess around with in the yard.
I have a purchased portable ice shanty which works just fine but I gave this project a try anyway. And you’re right. it sounds more complicated than it is. This was simple and took very little time. AND – this shelter holds up to the wind much better than my purchased shanty. I mounted skis on the wall as suggested so i only need to strap all my gear on the shelter and drag it out on the ice behind the 4 wheeler. I spent less than $50 to make this portable shelter and couldnt be happier. THANK YOU!
u wont catch me on the ice i don care how thick. i built one of these with my grandkids and they love it.
Great plans. Heading out soon and need an extra shack. Any suggestions on a floor? My only concern is keeping that shack on the ground(ice). Where/how would be a good spot for weight. Would like to leave the shack unattended for a night or two. Thanks for the ideas!
MN we never left these out overnight on the ice but we have left them setup in the yard for the entire winter. If you leave enough tarp hanging over the sides it wil leave ample room to pile snow on the overhang and secure the structure to the ground. As for the floor if you make the portable from 8 foot pieces of plywood, and use the 6 foot height mentioned in this article, you would have 2 foot of each plywood leftover. This would be enough to create the floor for the area where you would be sitting.
Exellent hut design! any idea on what it weigh’s when complete? Is it light enough for one man to drag out on a lake on foot? Thanks again! Oh where do the ski’s mount? didnt cover that in the article
Hello Ron. We mounted the skis on the side opposite the door. It wasn’t covered in the article because it was an extra. Most people don’t have a pair of skis laying around that they’re willing to sacrifice. As such most would opt not to attach skis. Personally speaking, if you’re pulling the unit out on the lake by hand, then the skis are a tremendous benefit as you pack everything on top of the portable for easier transport. We used a 12 inch piece of 2×6 to mount the skis. This gave use 6 inches of ground clearance which was suitable for pulling through the snow even with a gas auger, buckets, poles, tackle, and lunch strapped to the top with one man pulling. The total weight would depend completely on what type of material you use for the end pieces. We used half inch plywood. Not the lightest but quite manageable especially for two people. Lots of other people went very el cheapo using whatever was on sale. Those who used quarter inch particle-board had an extremely light portable but it didn’t last very long especially if they didn’t paint it. A couple others used some very thick material for the end pieces and while it was quite sturdy it was also quite heavy which in turn defeats the portability aspect. If I had to venture a guess I would say the entire project weighed in around 60 pounds. Again you can make it much lighter or heavier depending on the size you build and the type of materials used. Good Luck Fishing.
Awesome Thanks! Is there any way I can see a pic of it open and closed?
Sorry Ron. This is actually an old article revised from years ago. I am unable to find any of the old related pictures that made the trip when we rebuilt the entire website. I cannot think of a better visual than that of a covered wagon where the openings on each end would be your plywood. If you build one and would like to share the picture we’d be glad to post it for you so others can see the final product.
Ron this isnt one of our pics but this is your basic view of the outside. Not much detail but here you are.
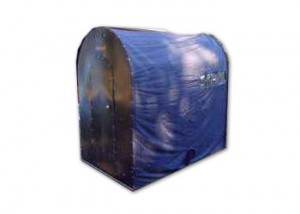
If you still want to send us your own pic feel free.
We built one of these last year and we still use it a lot this year. The tarp has a few small holes in it but it’s minor. we could replace tarp pretty easy. we used the thinest osb board we could find and its light as a feather even for one guy but it is falling apart at the bottom after getting wet. go with the thivcker plywood and it will be even better.
I made one of these 4 years ago and I still use it. The tarp was a little beat up around the edges and I used the tarp tape to repare. good as new. i made mine small 4 feet wide and 4 feet tall its light as a feather. I strap it to my atv cargo rack using the two inside braces as supports. I pile my heater and everything on top of that in a milk crate and strap it down and off I go. Skis would be ok for fishing near shoar but I’m over a mile off shoar. When the snow gets real deep I have a larger sled the portable rests on and I ytransport with the snowmobile. anyway it works good for me. Mine looks just like the picture except for the size. mines more square. I only made it 4 by 4 so i only needed 1 sheet of plywood.
I’m in minnesota. I built two of these for mainly walleye fishing. the 1st one i dint add enuff tarp. it was just enuff to go around the end pieces. i alwasy had wind getting underneath and freezing the holes unless i piled snow real high. my stupid mistake. the 2nd one i built i follow insitructions and left plenty of overhang tarp. this gave me lots of tarp on the ice that i piled snow on. awesome! theres no way wind gets in now and it makes the portable much more solid. strong winds…really strong winds havent even moved this one bit. Thanks for the plans.
Have used this great design for several years now. Used stainless steel piano hinges for the attachment of ends to the floor. All 1/4″ plywood treated with Thompsons water seal prior to the build. This design lasts an average of 2 years, longer if you get her up on pallets and keep the floor off of the ice and water. Replace the tarp covering anually, it’s cheap enough. See you on the ice! FLAG!!!
I am planning on building one of these but was wondering if it would fit in a car or van and how much it would be if its too much im just going to buy a $150 4 man. And how many people can it fit/fish.
Thanks.
Christopher – One of the most appealing aspects of this project is the customization. You make this ice fishing hut to suit your needs. If you want it to slide into the trunk of a car then measure the trunk or the space you have in the van and transfer that to the width of the plywood. At four feet wide as shown in the instructions you would easily slide this into a van but obviously not a car or every car trunk. As for room to fish 4 people you can also accomodate that number or more by choosing a longer tarp. Since it’s likely the fishermen will sit side by side figure out how much space each needs comfortably and buy your tarp at least that length. We fish two people fishing two holes each comfortably in this size hut. You can finish this project for under $150 easily unless you want to customize with windows doors on each end nice skis to pull it behind an atv or snow-machine but that again is the builders choice. Even then you would probably come in under $150. Invite a couple friends over and you can knock this project out in a couple hours and be on the ice testing it out.
me and some friends made one of these 12 feet long and we fish 4 people in it. we sit opposite each other like first guy faces north next guy faces south then north and south again. that way we aint rubbing sholders or elbows. it works great and you aint gonna buy something like that for the price. mine didnt have any fancy stuff like skis or windows andonly cost 60 bucks to build. i painted it with paint i already had. so to chris i think you can easily build it for less than 150 no matter how big it is. i slide mine into the back of the truck then we carried it onto the ice not very far out for fishing yellow perch.
I also built mine 12 feet long by 4 feet wide. 4×6 foot end walls along with two full 4×6 floor pannels framed in with 2″x2″ post. The floor has four framed out holes with hinged covers on them so they can be closed up when not in use or if you need more floor space. Each floor panel is hinged to the bottoms of the end walls and folds up for storage and transport. Basically four panels stacked on top of each other with the tarp folded up in the middle. Mine is heavy but it is maneuverable and very durable. I also double layered the tarp to keep more light out and cut a hole in one end wall and put in a metal sleeve to accomodate wood stove piping. pretty nice a cozy in there! haha!
i would like to build one for pike spearing with a hole in the middle. with a guy at each end how could i make the floor
Hey great ideas I’m 14 and am planning one of these now would It fit in a 1500 Yukon xlt thanks
Don’t know much about a 1500 Yukon but if you have 4 feet between the wheel wells and build it to these specs it would lay nice and flat in the bed of the pickup. If not it would ride one side higher and that’s no big deal. Good luck with the project Tom and good luck on the ice.